


How to Make a Custom Keychain Craft Your Story: Personalized Acrylic Keychains
Looking for a totally original and creative way to add some flare to your keys or some personalization to a gift? All you need to do is look at personalized acrylic keychains! Those little wonders are pretty neat and provide an endless amount of configuration options. With the help of this article, you will be able to turn a blank canvas into a small work of art by making your own personalized acrylic keychain. Uncovering Your Originality: Choosing a LayoutChoosing your layout is the first step. Is it going to be a picture, a weird drawing, a motivational quote? The beauty of acrylic keychains is how adaptable they are. Here are some tips to spark your imagination:
The material you want for custom keychains depends on what kind of keychain you want to make! Here's a breakdown of some popular alternatives:
Base Fabric:
Acrylic:
Sheets of clear plastic that can be cut into shapes or decorated [image of acrylic keychain blank]. Top notch to show designs or pix.
Metal:
Strong and available in a variety of finishes such as silver, gold, or bronze [image of metal chain]. Suitable for engraving or printing trademarks.
Percentage (Polyvinyl Chloride):
A bent rubber fabric that can be moulded into special shapes [picture of PVC keychain]. Perfect for making colorful and distinctive keychains.
Wood
Herbaceous and warm looking. Difficult designs can be laser cut [image of wooden chain].
Fabric:
Can be embroidered with designs or markings [image of embroidered keychain].
Hardware:
* **KEYCHAIN JEWELLERY:** Attach your creation to keys.
* **Jewellery Addition:** Add keychain results to the main content.
* **Clasps:** For extra comfortable closure.
Decorations (optional):
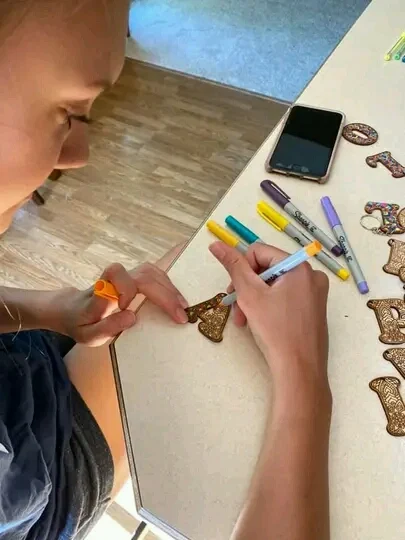
Paints, Markers, or Pens:** To personalize the base fabric.
* **Vinyl Decals or Stickers:** Pre-made designs for seamless utility.
Resin:Forms a shiny, defensive layer and can embed small objects.
Beads, Charms, or Findings: Upload dangles or gildings.
Additional tools (depending on your challenge)
**Scissors or craft knife**
***Hollow Punch**
**Sand paper or document**
* **Laser cutter or vinyl cutter (for complex designs)**
Oven (for baking polymer clay)
MOULDS (FOR RESIN CASTING)
Keep in mind, this is just a starting line! There are many other materials and techniques you can explore to create unique custom keychains.
Artistic Expression:
Showcase your original artwork, digital image, or fun pattern. * **Motivational Words
Create a keychain with a motivational statement, your initials, or a special message. * *
Memories in Miniature:
Use an adorable photo or memorable occasion from your time at university.
Determining Proper Size:
After finalizing your design, consider the dimensions of the keychain. Smaller keychains are given more attention, but larger ones offer more design space. Choose a size based on your preferences and configuration.
Changing Your Perspective:
Virtual to Real Talent is about to begin! Here's where the design you've chosen comes into play:
1. Cleanly Slicing:
Cut your layout out of the acrylic sheet using a craft cutter or professional cutter.
2. Weeds Care:
This involves carefully removing any excess acrylic from your design, leaving your desired look in place.
3. Transfer Magic
Work on your swatch paper skills to illustrate your pre-cut acrylic keychain arrangement.
4 Combining the Pieces:
Gently remove the swatch paper, taking care that your design is perfectly aligned with the acrylic keychain.
5 Including last details
It's the time to add that finishing touch to your keychain! **Hardware for Keychains:** To make your keychain able to safely hold your keys, attach a bounce ring and a keyring. * **Time of Tassel:** Add a decorative tassel to your arrangement in a colour that complements it for a dash of whimsy.
o.k., concentrate on craft pal! It is time to bake the ones first rate keychain designs you made from reduced plastic. right here's the thin on how to get them miniaturized:
Baking Up Magic
First things first, hearth up that oven! Set the temperature dial to 325 tiers Fahrenheit. That's warm enough to make the plastic reduce down to a keychain-sized cutie, but no longer so warm that it burns.
even as the oven preheats, grab a sheet of parchment paper or aluminium foil. gently lay your plastic advent on the pinnacle. This can make it simpler to take it out later, and prevent any melty mishaps in your baking sheet.
Once the oven reaches temperature, carefully slide the parchment paper (or foil) along with your plastic keychain onto a baking sheet or pan. Be careful, the pan is probably warm!
Now comes the fun element! Pop that pan inside the oven and watch your layout reduce down before your eyes. it's like magic, however with science!
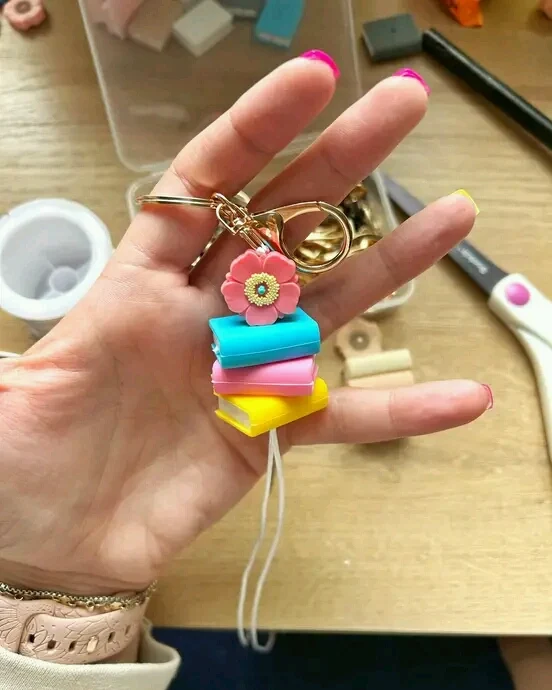
Make Your Arrival Public
Your unique keychain is finished! Use it as a purse charm, tie it around your keys, or give it to a particular person. Recall that the options are virtually limitless. So let your imagination run wild and make a keychain that tells your special tale.
Bonus Advice:
Once your design is attached with a clean chain, cover it with a layer of clear sealant for added strength. This can assist in shielding your layout from fading and damages. You can create stunning and useful personalised acrylic keychains with a little preparation and these easy steps!


0 Comments