


 |
| Creating Fun How to Make Shrink Plastic Keychains |
Creating Fun How to Make Shrink Plastic Keychains
Is it safe to say that you are searching for an innovative method for customising your keys or giving a companion an interesting gift? Then, at that point, you've come to the perfect location with shrinkable plastic keychains! In this Do-It-Yourself guide, we'll walk you through the simple tasks of making a delightful, customised keychain out of shrinkable plastic.
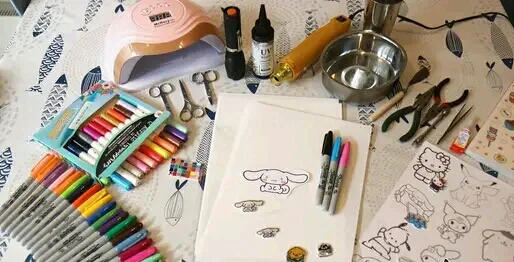
Essential material
The subtleties of the essential materials expected for making a shrink plastic keychain are
**Plastic Psychologist Sheet**
The principal material used to make recoil-wrapped keychains is self-contracted plastic, and these sheets can, as a rule, be bought at create stores and on the web. They are accessible in various tones, including clear, cool, and strong. Leaves are generally meagre, light, and solid, making them ideal for creating.
**Design Tools**
To make an interesting keychain plan, you will require an assortment of configuration instruments like pencils, markers, pastels, or pens. These apparatuses are utilised to draw or follow designs on plastic therapist wrap. Remember that the plan will psychologist to about 33% of its unique size, so many-sided subtleties might be lost in this decrease.
**Scissors or Utility Knife**
Scissors or utility blades are fundamental for cutting examples from contract film. Precise cutting guarantees clean edges and the state of your keychain. Youngsters ought to be managed while taking care of sharp apparatus.
**Punch or Drill**
To connect keychain parts like leap rings or split rings, you'll have to poke holes in the psychologist plastic prior to baking. You can use an opening punch planned explicitly for plastic or a little hand drill to make openings in your plan.
**Oven or heat source**
Shrinkable plastic chains expect intensity to shrivel and solidify. The stove is the most generally utilised wellspring of intensity. Preheat the stove as per the directions on the psychologist wrap. On the other hand, you can utilise an intense firearm or toaster oven. Notwithstanding, if it's not too much trouble, be cautious and adhere to the security guidelines to stay away from consumerism or fire perils.
**Baking Sheet or Material Paper**
In the event that baking paper chains in the stove, you will require a baking sheet fixed with material paper to keep the plastic from adhering to the baking sheet. Material paper additionally keeps up with the state of the plan during the contracting system.
**Keychain Hardware**
When the psychologist plastic has cooled, you will require keychain equipment, for example, hop rings, split rings, or keychain clasps, to append to your plan. The equipment is accessible in various sizes and styles, permitting you to additionally redo your keychain.
By using these essential materials and adhering to basic directions, you can make a customised knife plastic chain that makes the ideal gift or frill for yourself or another person. Explore different avenues regarding various plans, varieties, and shapes; release your inventiveness; and appreciate contracting plastic artworks.
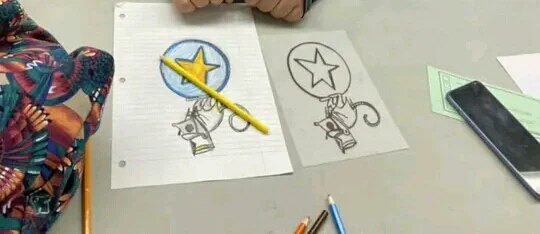
Stage 1: Set up your plans.
Wrap up a few psychologist wraps and let your creative mind roam free! Utilise indelible markers or shaded pencils to draw your plans on the plastic sheets. From beguiling animals to baffling examples,the conceivable outcomes are interminable. Remember that your plans will essentially contract. Thus, make it greater than you need to be the last keychain.
.

Stage 2: Cut out the illustrations and make openings.
At the point when you're finished drawing your plans, painstakingly cut them out with scissors. Remember to poke holes at the highest point of each plan using the perforator. This opening will later be utilised to append the keychain pieces.
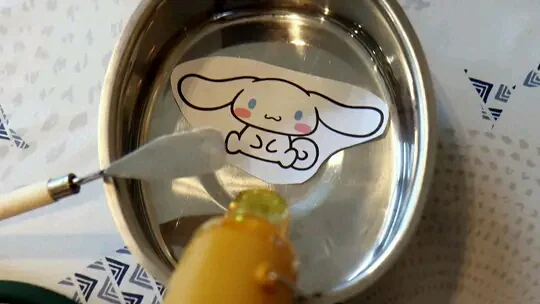
Stage 3: Backe
Preheat your stove as per the guidelines on the psychologist wrap. Put your pattern plans on a baking plate fixed with baking paper so they are not contacting each other to ensure they. Pop them in the broiler and watch them mysteriously shrivel and thicken. This typically just requires a couple of moments. So watch them closely and avoid overcooking.

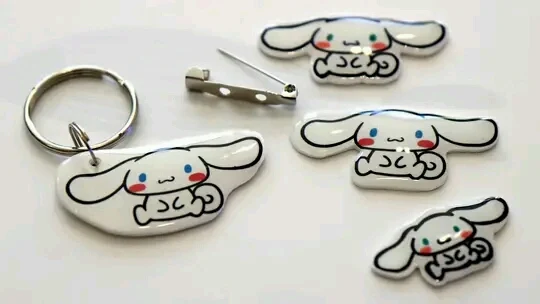
Stage 4: Make the Keychain
When your plans have cooled, now is the right time to collect the keychains. Join the leap ring through the opening you pre-penetrated, then add a keychain ring or other embellishment of your choice. He is there! Your psychologist plastic chain is prepared to utilise.
Stage 5: Finish any remaining plans.
Rehash the cycle for any remaining plans you make. Make an assortment of keychains by consolidating various shapes, varieties, and topics. Remember to add your own touch with adornments like globules, charms, or sparkle if essential.
Making shrink plastic chains is a tomfoolery and helpful art project that permits you to get imaginative. Whether you're making it alone or with companions, you're certain to have some good times planing and scaling down your own one-of-a-kind keychains. So accumulate your materials and begin making—your keys will be much appreciated!


0 Comments